While my children go to sleep with dreams of holiday presents and treats, my slumber is filled with all of the wonderful beer to be consumed in the colder months of the year. No, I’m not a huge “Pumpkin” ale fan, but I know a lot of people are. For me, Fall is for Porters and Brown Ales. But as the Midwest temp plunges lower and lower though, my tastes get a little darker and heavier.
You can’t get much darker and heavier than an Imperial Russian Stout. It just SOUNDS like a serious beer for a serious beer drinker. So this is the idea I had: I want to make a smaller batch of this (after all, my usual 5 gallons of a 10+ percent abv beer seems like an awful lot of alcohol), bottle it up and give it away to friends and family at Christmas time. Nothing says Happy Holidays like a bottle of highly alcoholic motor oil!
Since this is the first time I have:
- Brewed an Imperial Russian Stout
- Tried bottling (I have always kegged)
- Brewed a smaller batch
I thought I would document this on the blog for everyone to read, learn and, ultimately give me advice on what I probably did wrong!
So, here we go. Buckle up, Santa is in the kitchen!
I wanted to brew a 2.5 gallon batch. This seemed like a good size to me for a couple reasons. First, I can just buy the 2.5 gallon jugs of water at the store to make the beer with. Second, I modeled my recipe as a hybrid of some of the other IRS recipes I found on the internet. These were all for 5 gallon batches. So, with 2.5 gallons, the conversion of ingredients seemed to be a lot simpler with just needing the halve everything. By the way, if you want to brew a smaller batch of something that isn’t exactly half of the recipe you have, then there is a pretty simple equation. Take the original amount of the ingredient, multiply it by the unit of volume you want to brew, then divide it by the unit of volume of the original recipe. For instance, if the original recipe for a 5 gallon brew calls for 5lbs of malt, but you only want to brew 2.5 gallons. Take the 5lbs of malt multiply it by 2.5 to get 12.5, then divide 12.5 by 5 and you will get 2.5lbs of malt needed. I did this using very simple numbers for the purpose of explanation, but it will work no matter how complicated the measurements are.
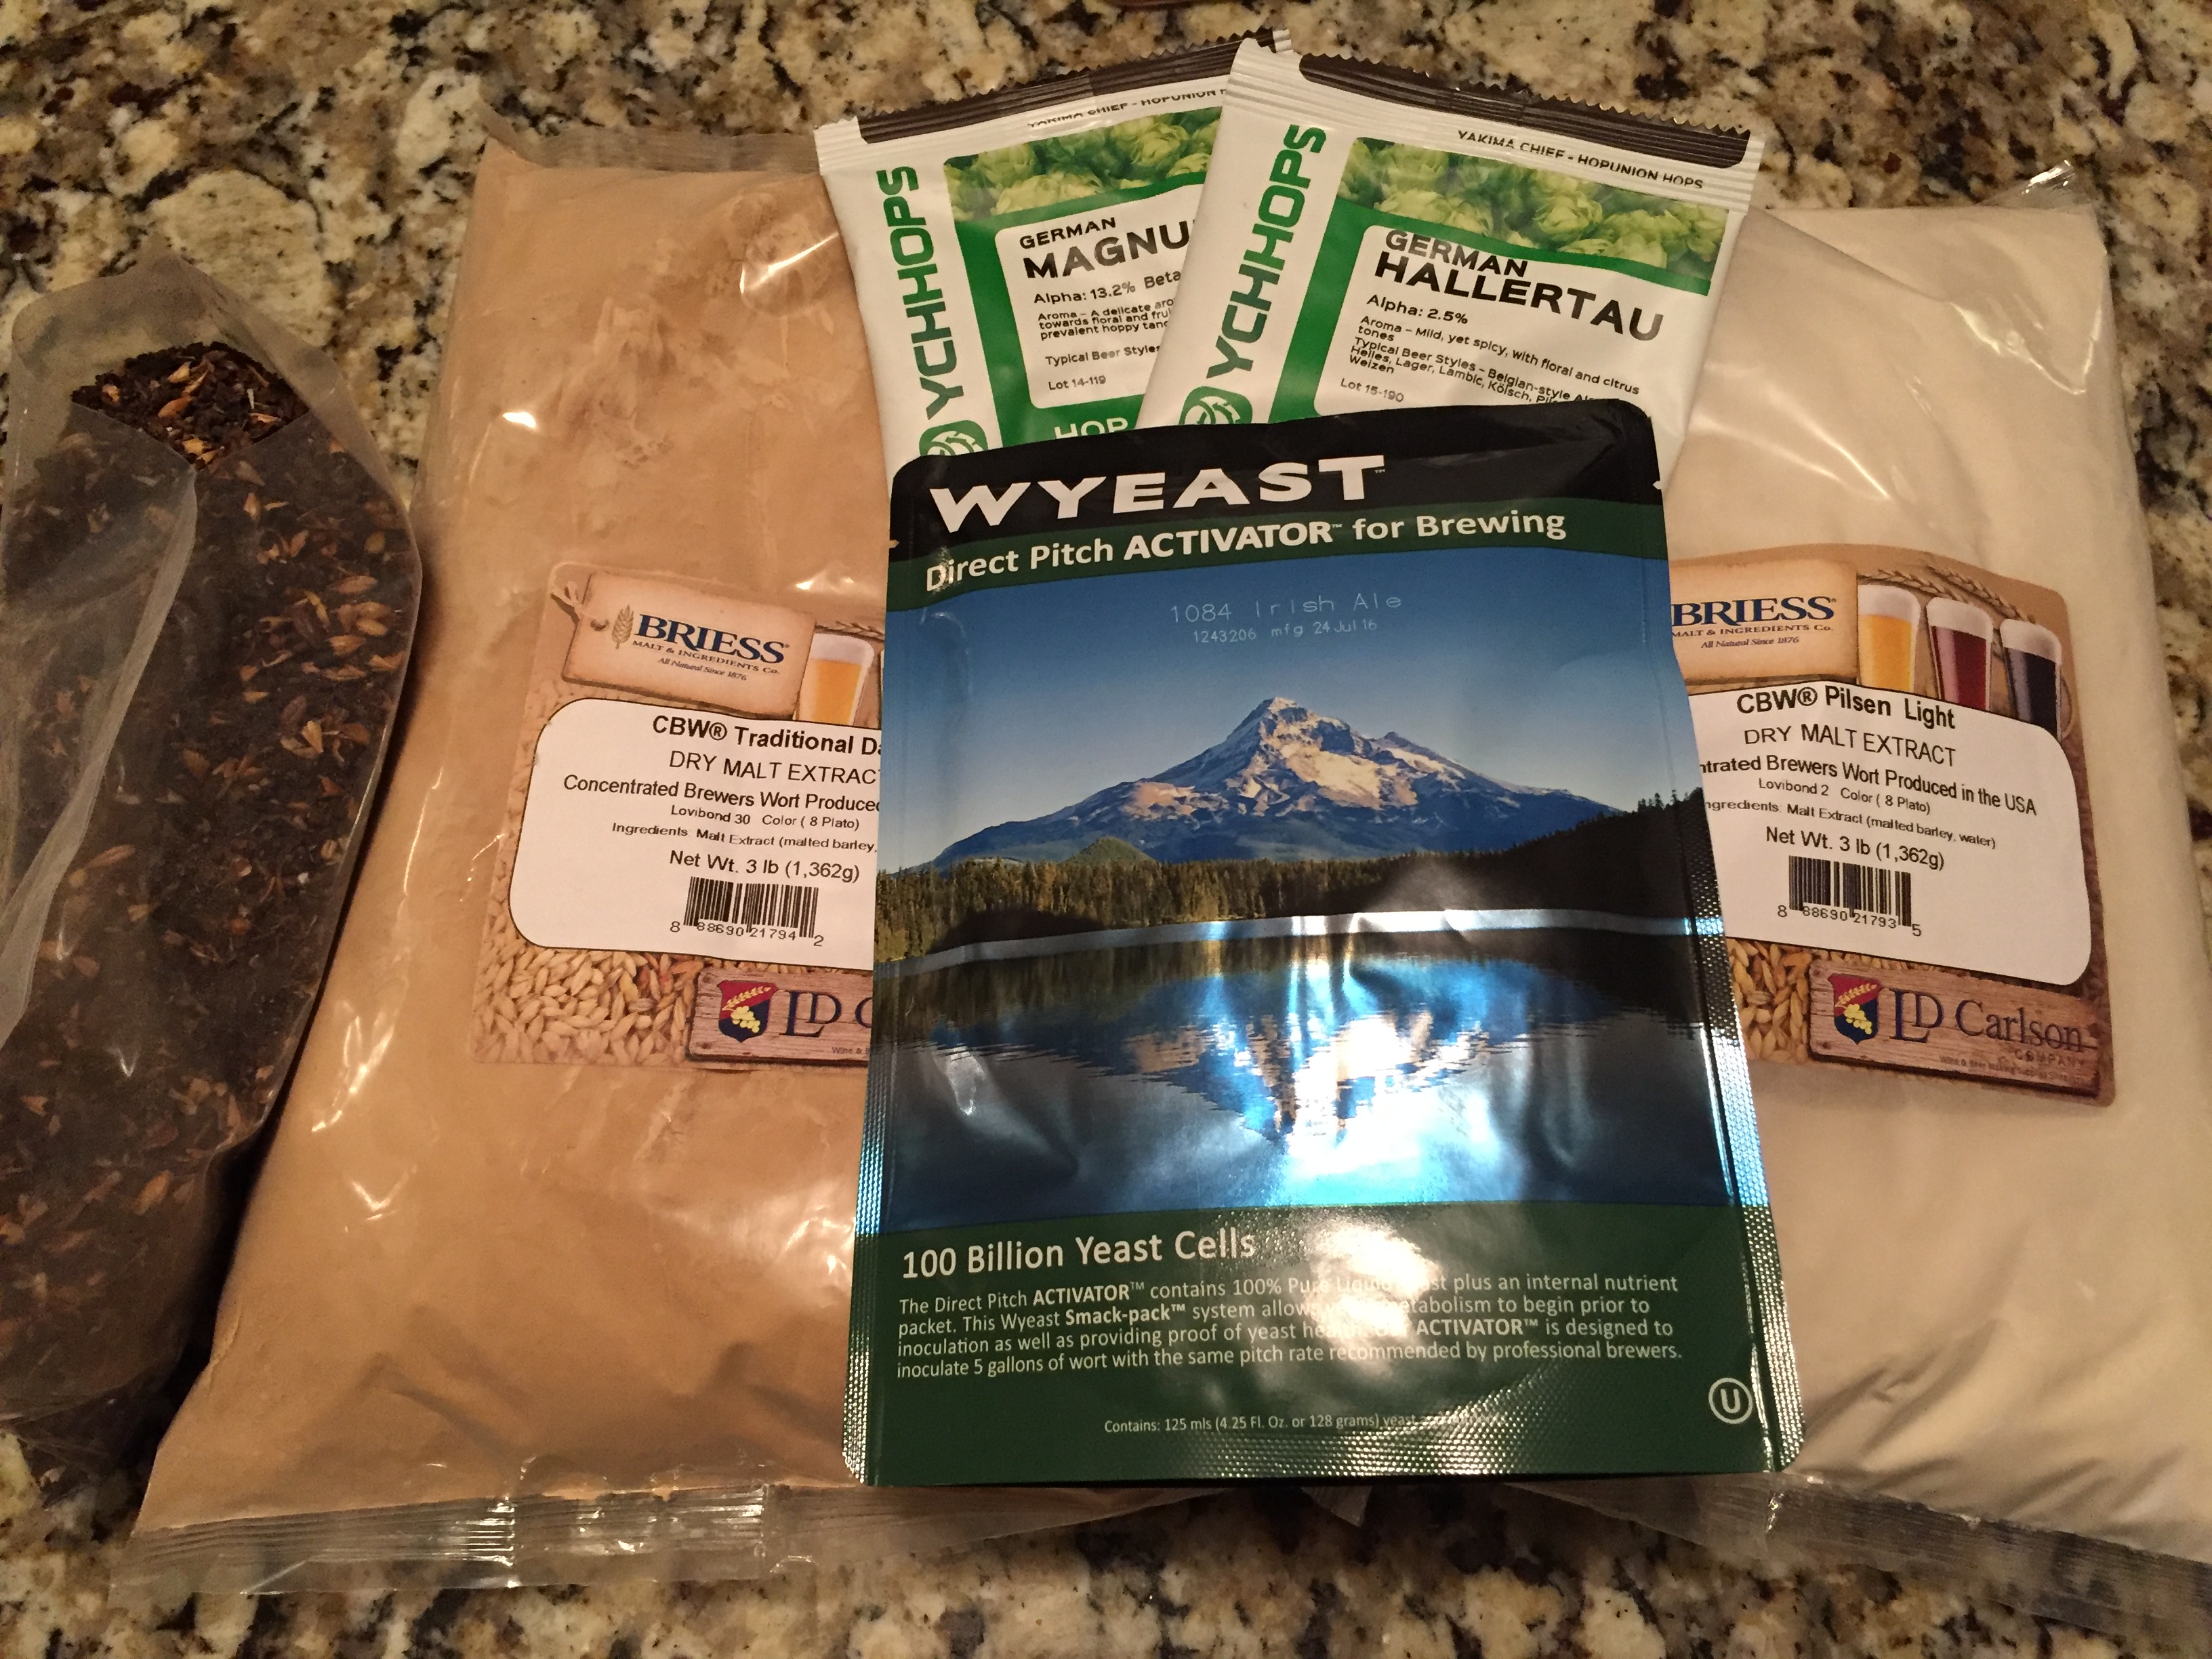
Here is the list of ingredients. Again, this is for a 2.5 gallon brew.
GRAINS
- .25lbs of Muntons Chocolate Malt
- .25lbs of Patagonia Caramel 90L Malt
- .25lbs of Muntons Roasted Barley
EXTRACT
- 3lbs of Briess Pilsen Light DME
- 3lbs of Briess Dark DME
HOPS
- 1 oz of Magnum (added at 50 mins)
- 1 oz of Hallertaue (added at 60 mins)
YEAST
- Wyeast Irish Ale 1084
BREWING NOTES
I seeped the grains at 150 degrees for 70 minutes. I really wanted the complexity of the grains to shine through on this beer. It got to be a nice rich, dark color, exactly what I was looking for.
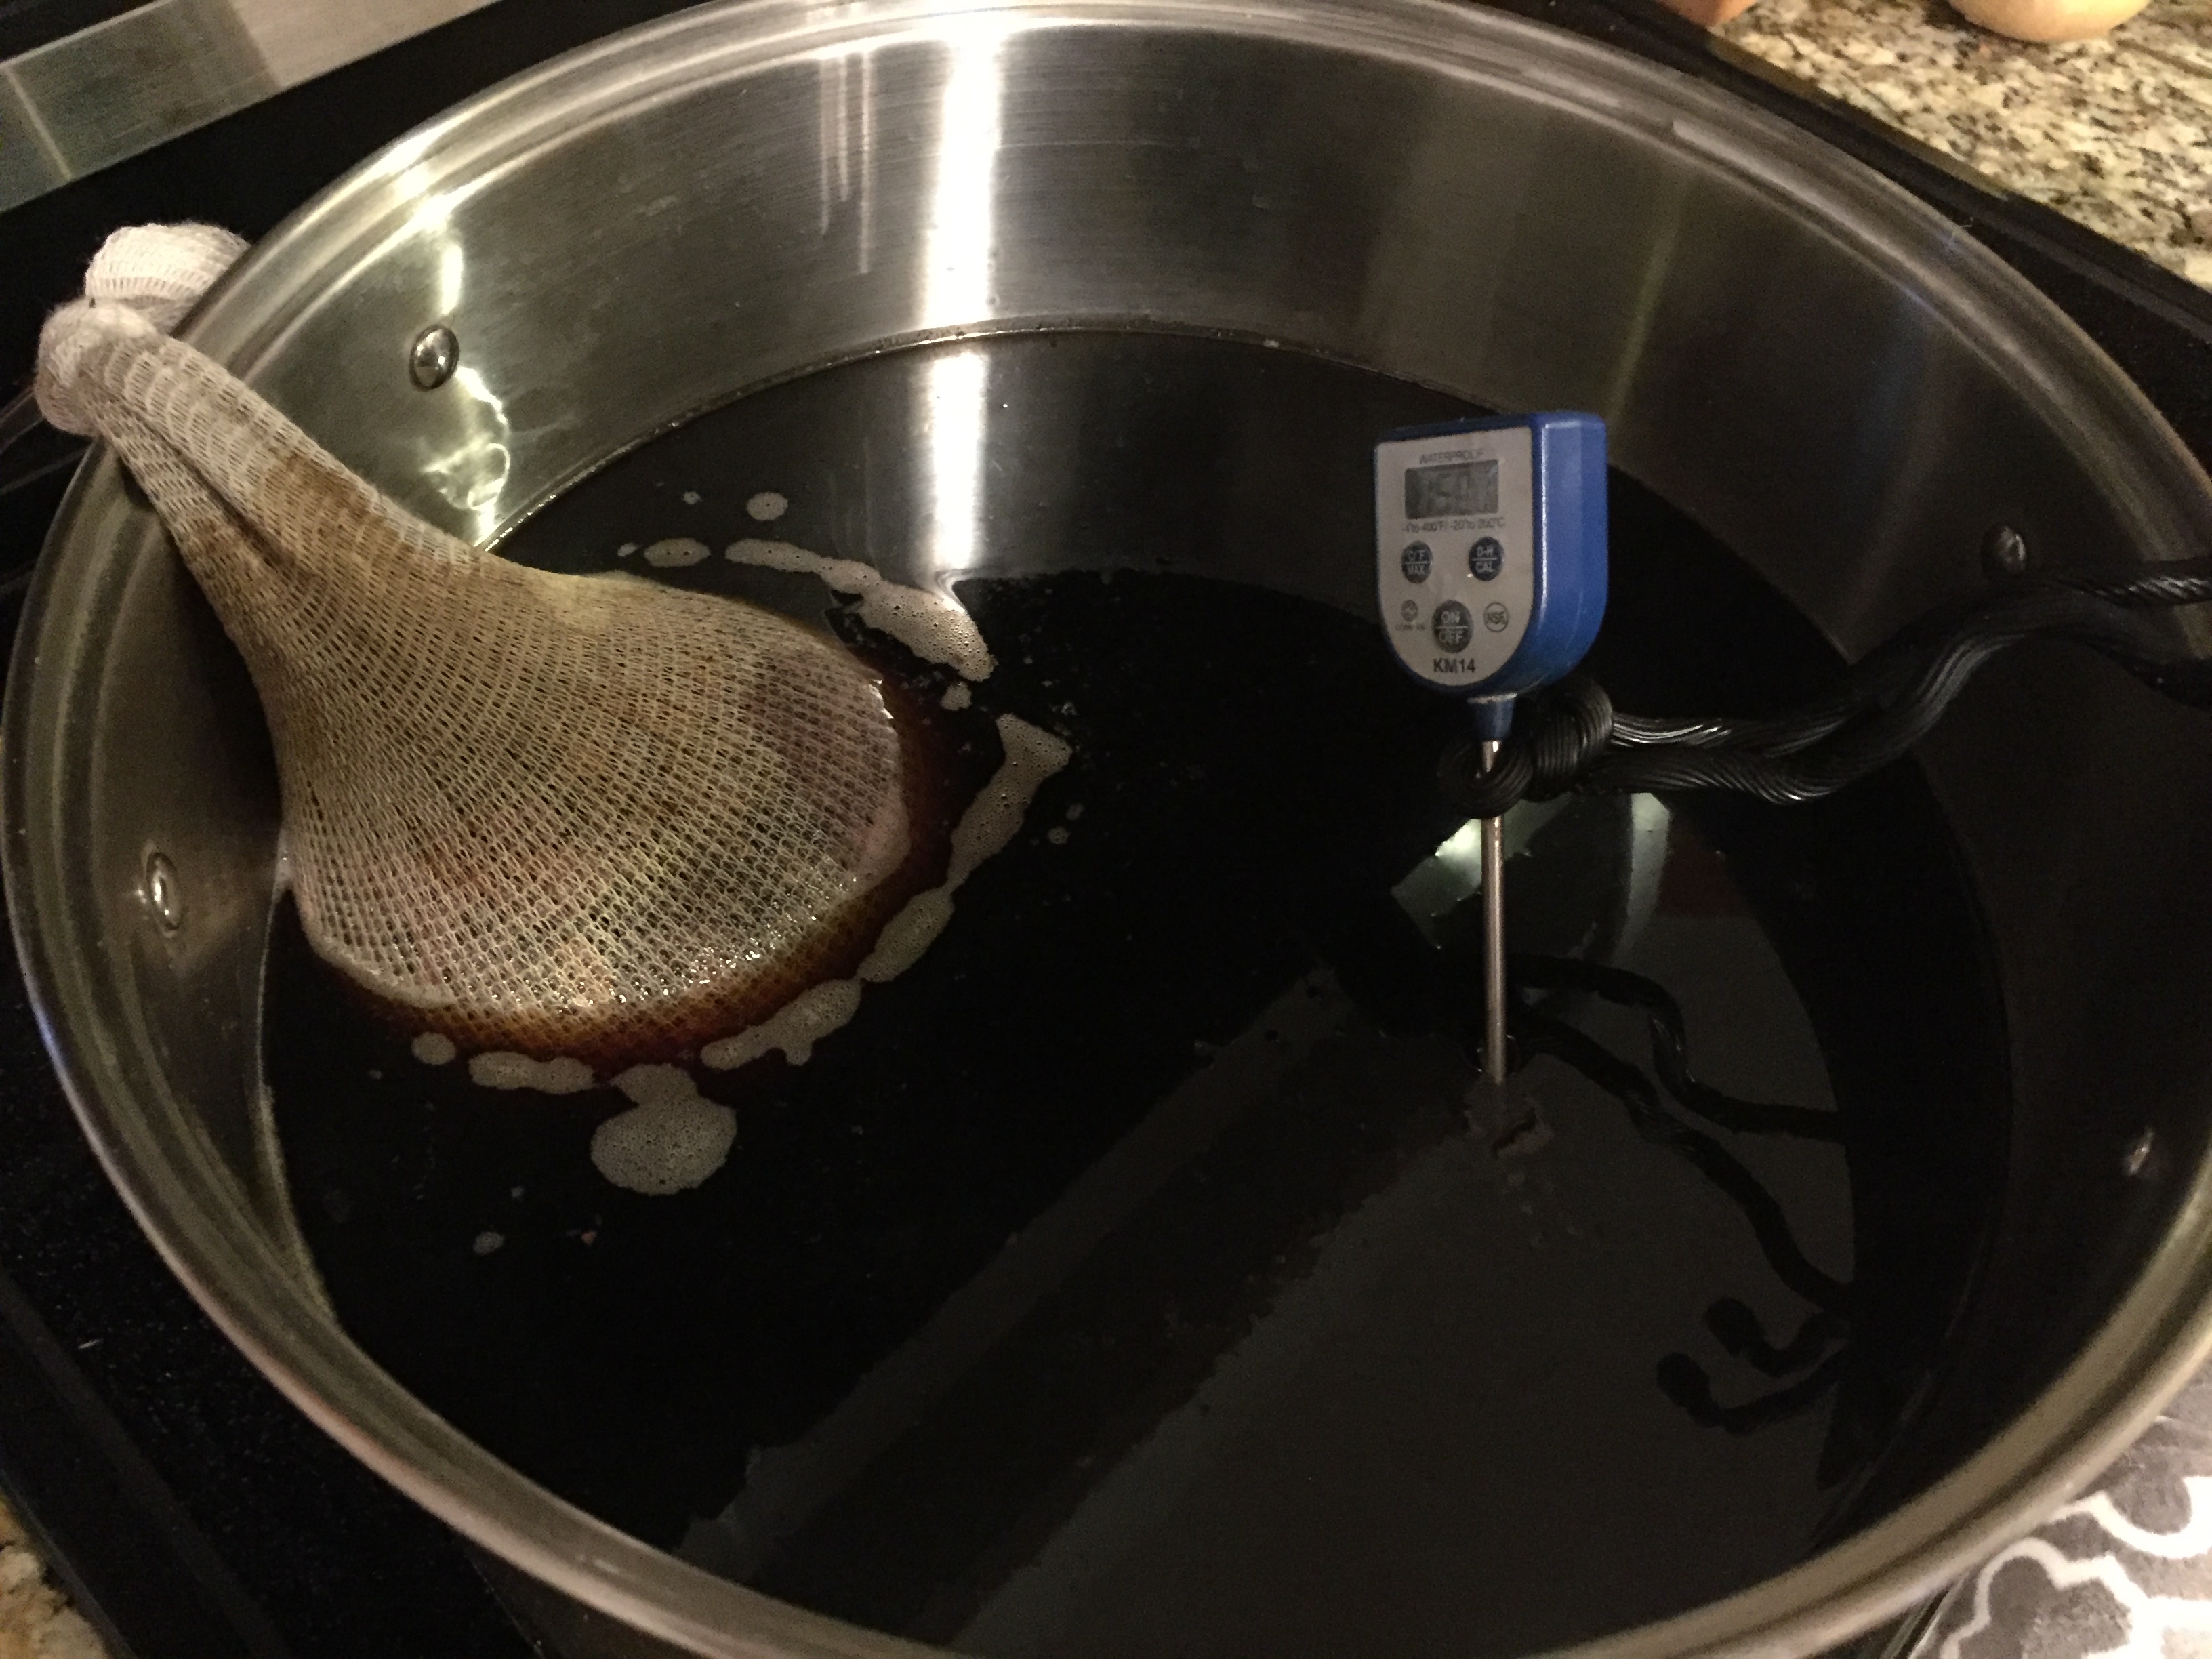
Note on the picture above my genius way of keeping tabs on the temperature! Those twisty things can do anything! 🙂
6 lbs of malt extract also seemed like a lot for a 2.5 gallon batch of beer, but, hopefully this is where I will be able to get my friends and family drunk after the yeast goes to work. I did the late addition of the hops because I really didn’t want the beer to be dominated by any hops or bitterness. I really just wanted the malt and the grains to shine through. Finally, I wasn’t sure about what and how much yeast to use. I asked the guy at my beer supply store and he suggested the Irish Ale. He wasn’t sure if I needed one or two packets. I got one. Because I’m cheap. I hope it will be enough.
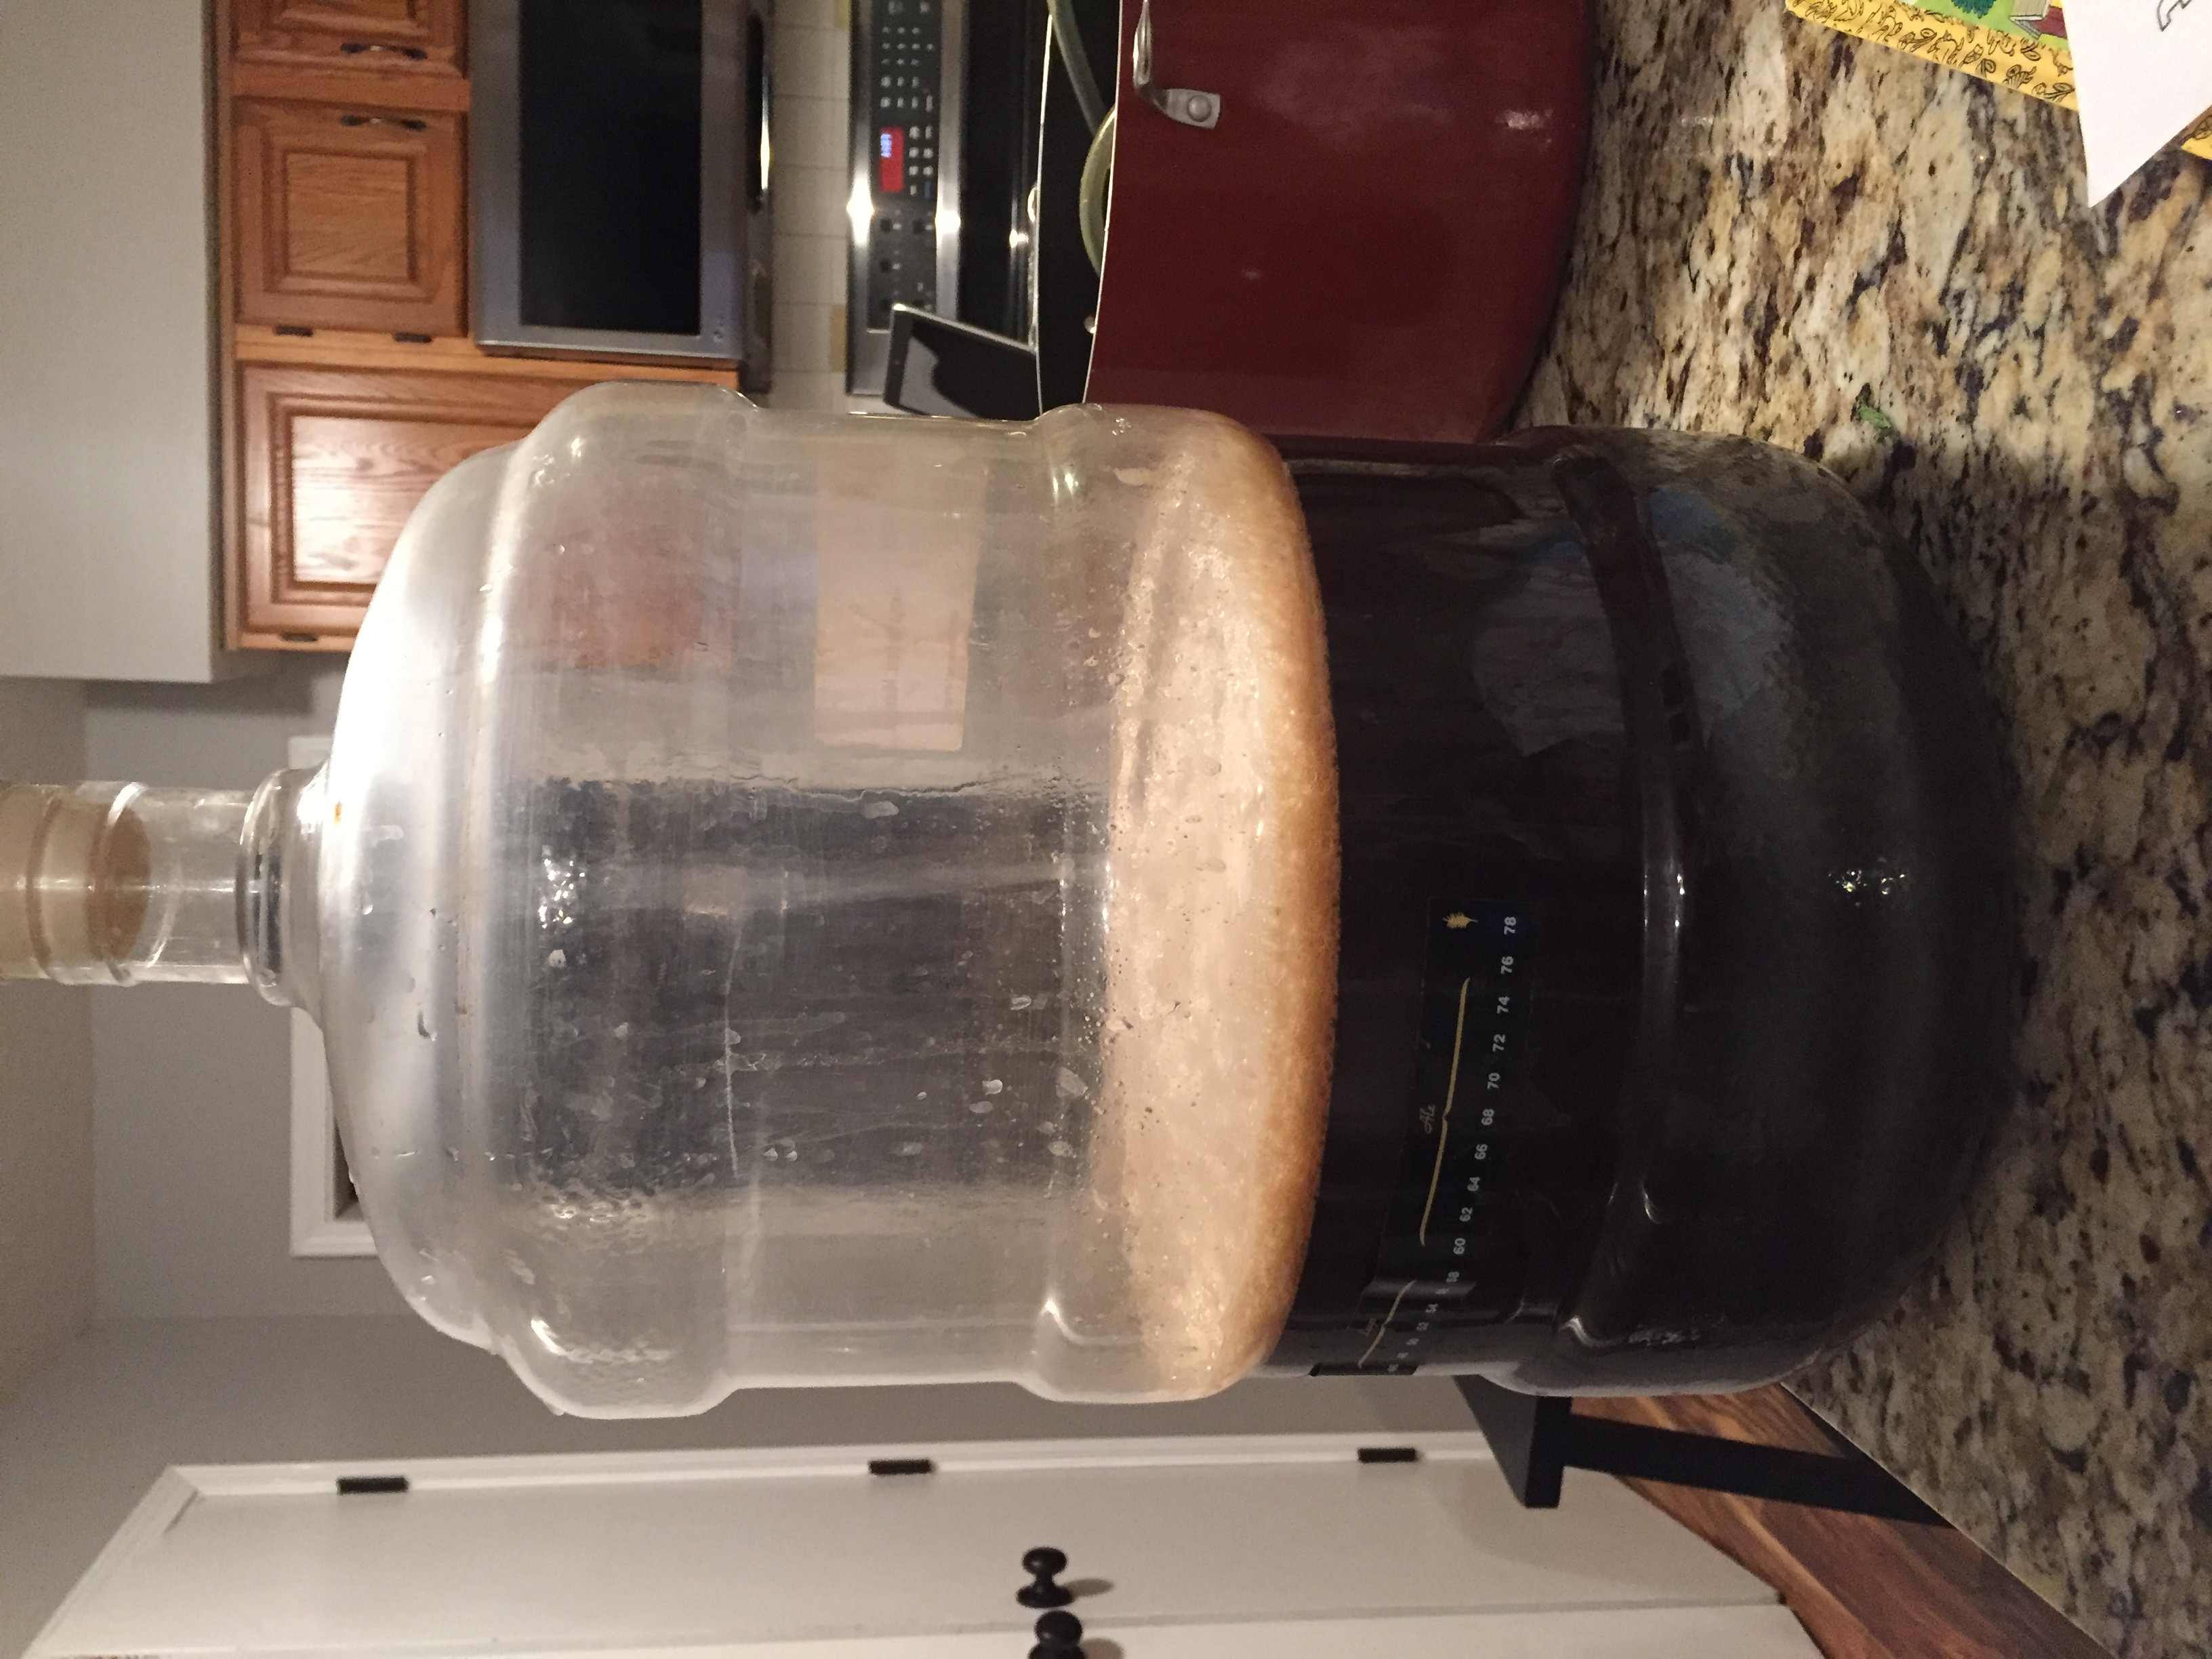
My original gravity for this beer is a healthy 1.111. This is where I am scared that maybe I should have used more yeast. I am still pretty new to brewing and every beer I have brewed, I have focused on learning something new about the craft. One of the things I want to learn more about on this adventure is the OG and how the yeast affects it.

I don’t know much about yeast starters either and am wondering if I should have used one on this. Will one packet be enough to eat that 6lbs of malt extract I put in there? We will have to stay tuned to find out. I’ll keep this post updated to let you all know the progress.
UPDATE 12/4/16 BOTTLING DAY
Ok. My beer has been hanging out it’s secondary (bottling) fermentor for about 6 weeks now. In mid-October, I went ahead and moved it. While doing so, I took another gravity reading and got a 1.04. This would have given it an ABV at that time of 9.19%. Yikes! And it wasn’t even done cooking!
So I was a little bit apprehensive when I took it out today to prepare to bottle and to get another measurement. A: Because if the reading had moved a lot more, then I’d have to figure it wasn’t ready to bottle and I REALLY want to give these away as Christmas gifts but don’t want the bottles to explode on the unsuspecting recipients! And B: If the gravity reading got any lower, we would be talking about a seriously strong beer! Too strong for even the alcoholic friends/family that I am planning on giving this to.
So when I saw the gravity reading of 1.03. I felt pretty good. This is the beer telling me that it is ready to slip into something more comfortable (if you count a 22 ounce glass bottle as something more comfortable….). I am going to have a final ABV of about 10.5%. God rest ye merry gentlemen! Seriously, you will go to sleep after drinking this. Be prepared!
I had never bottled before and really had no idea what I was doing. So I leapt into it with my usual mixture of passive research and active improvisation. Since I don’t plan on bottling too much in the future, I didn’t want to spend too much money on investing in sanitizing and drying equipment (i.e. trees and such). I know sanitizing is important. I know.
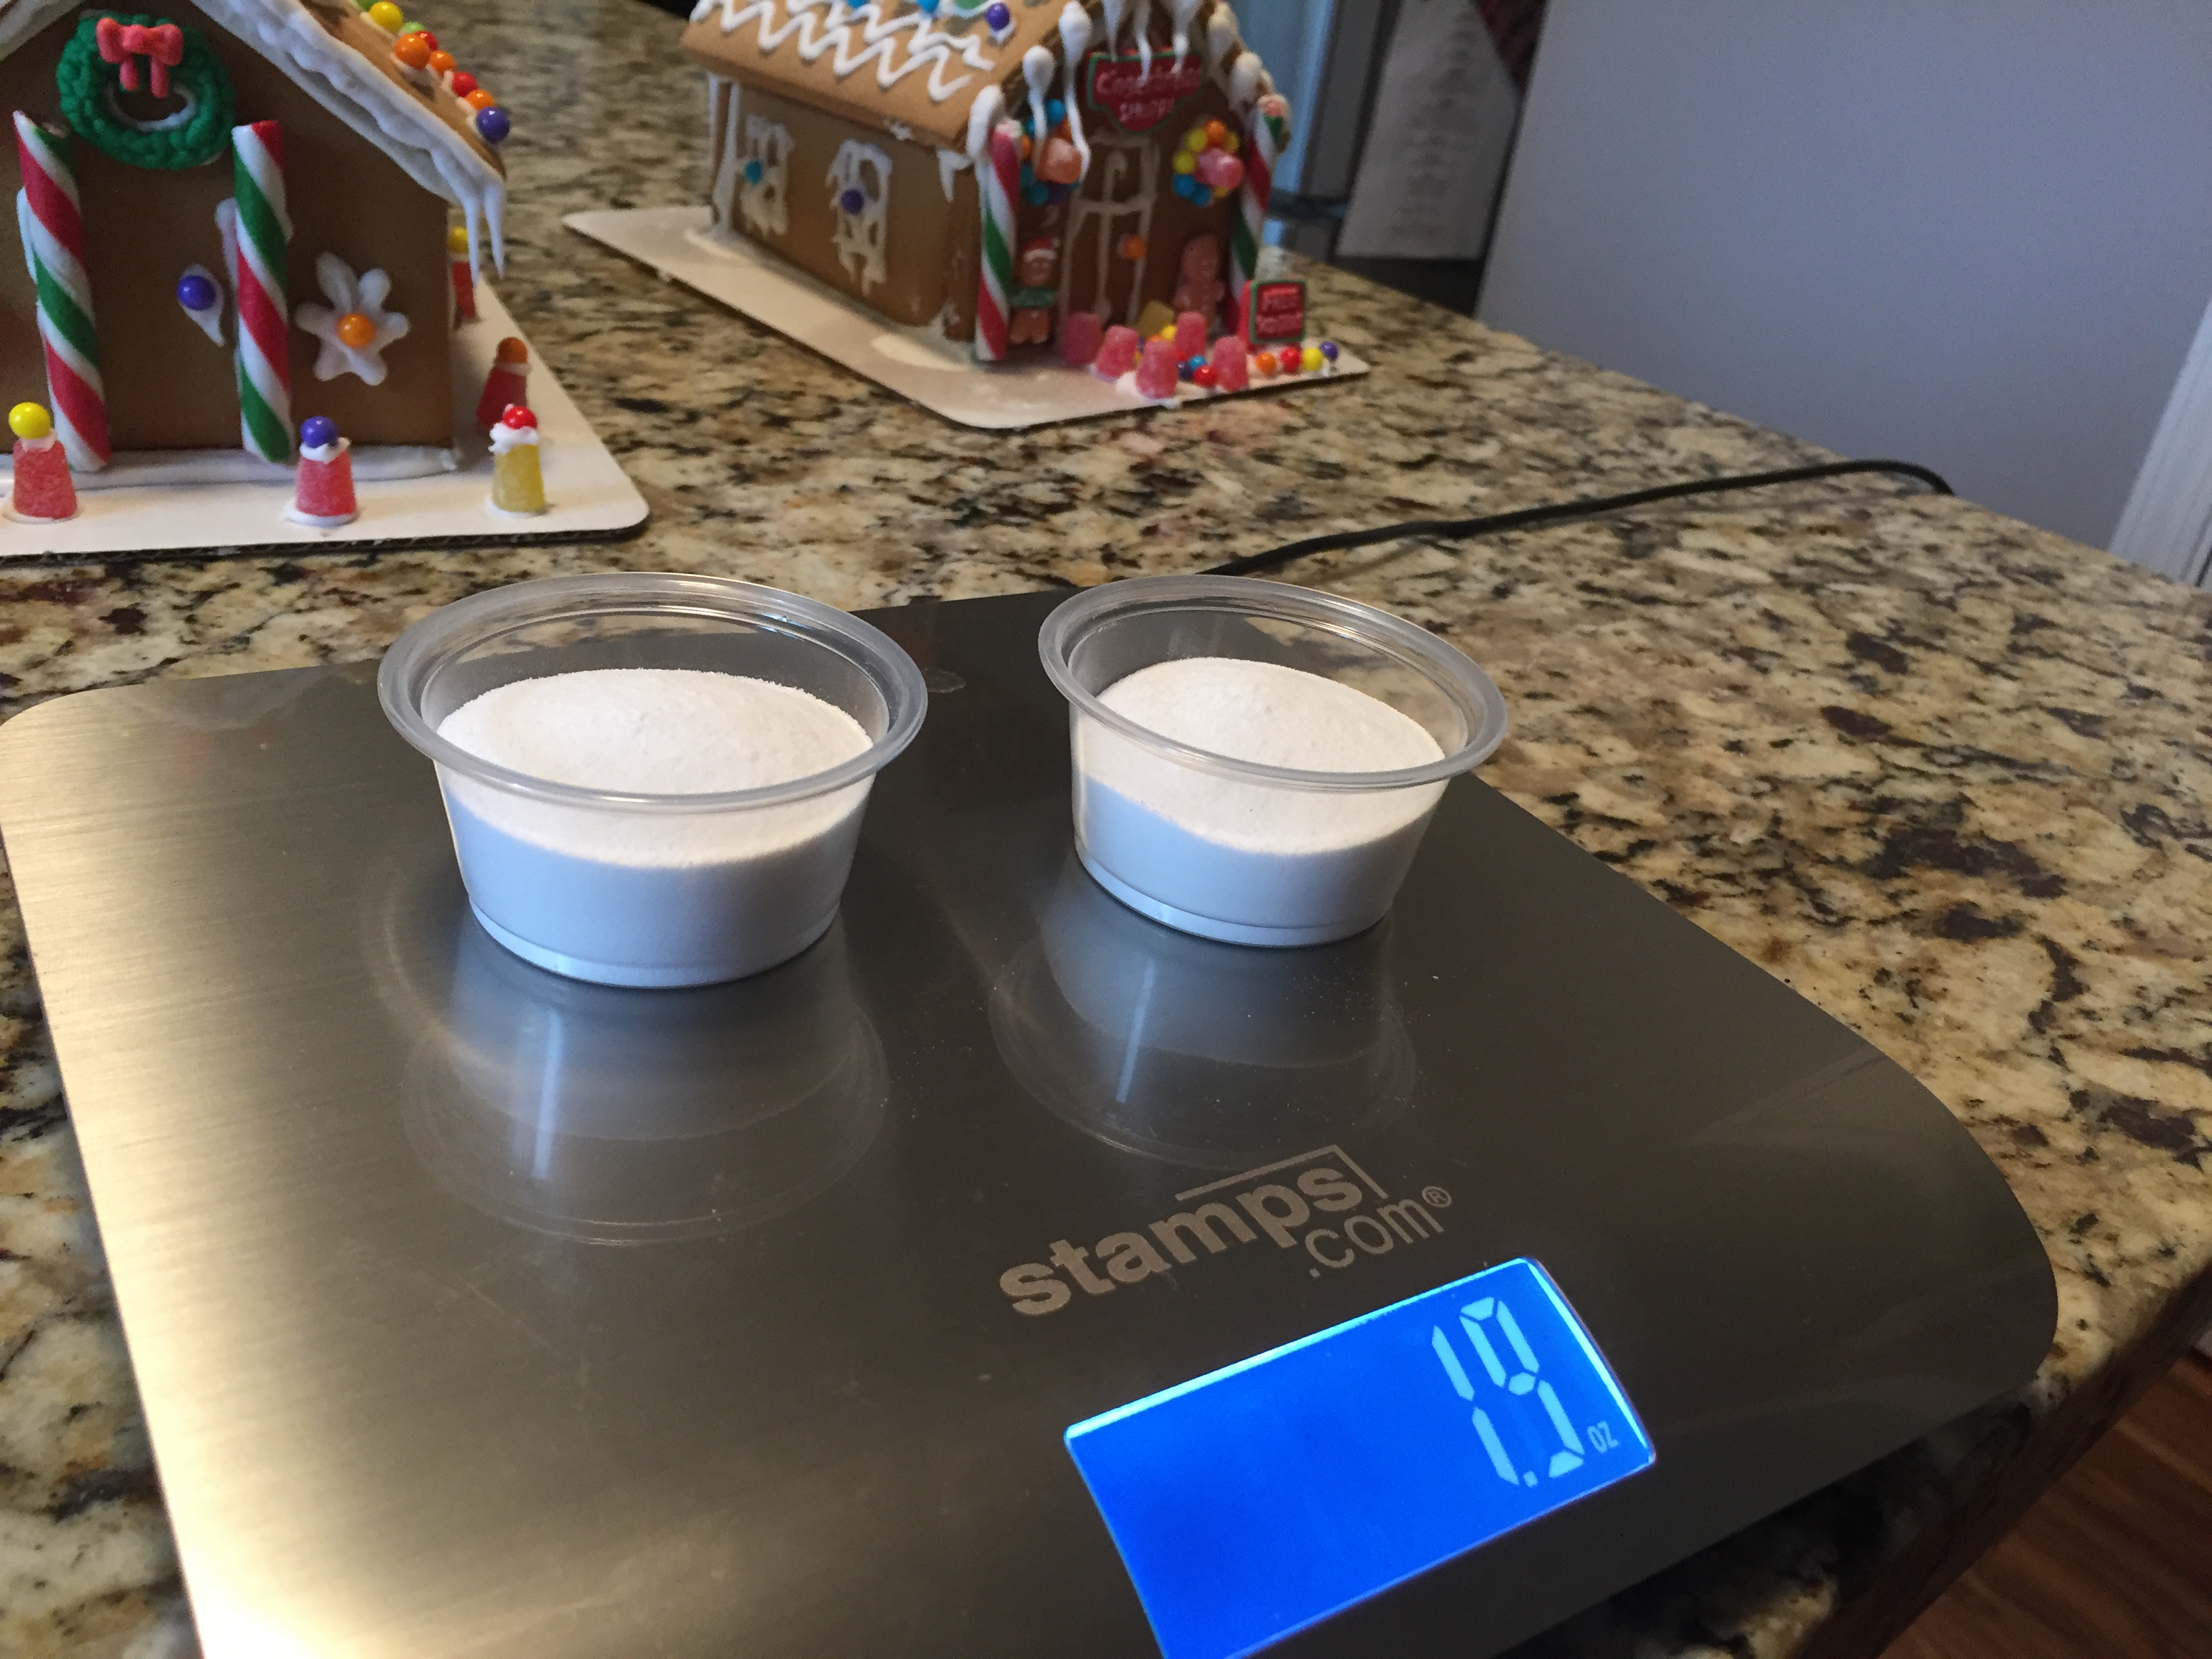
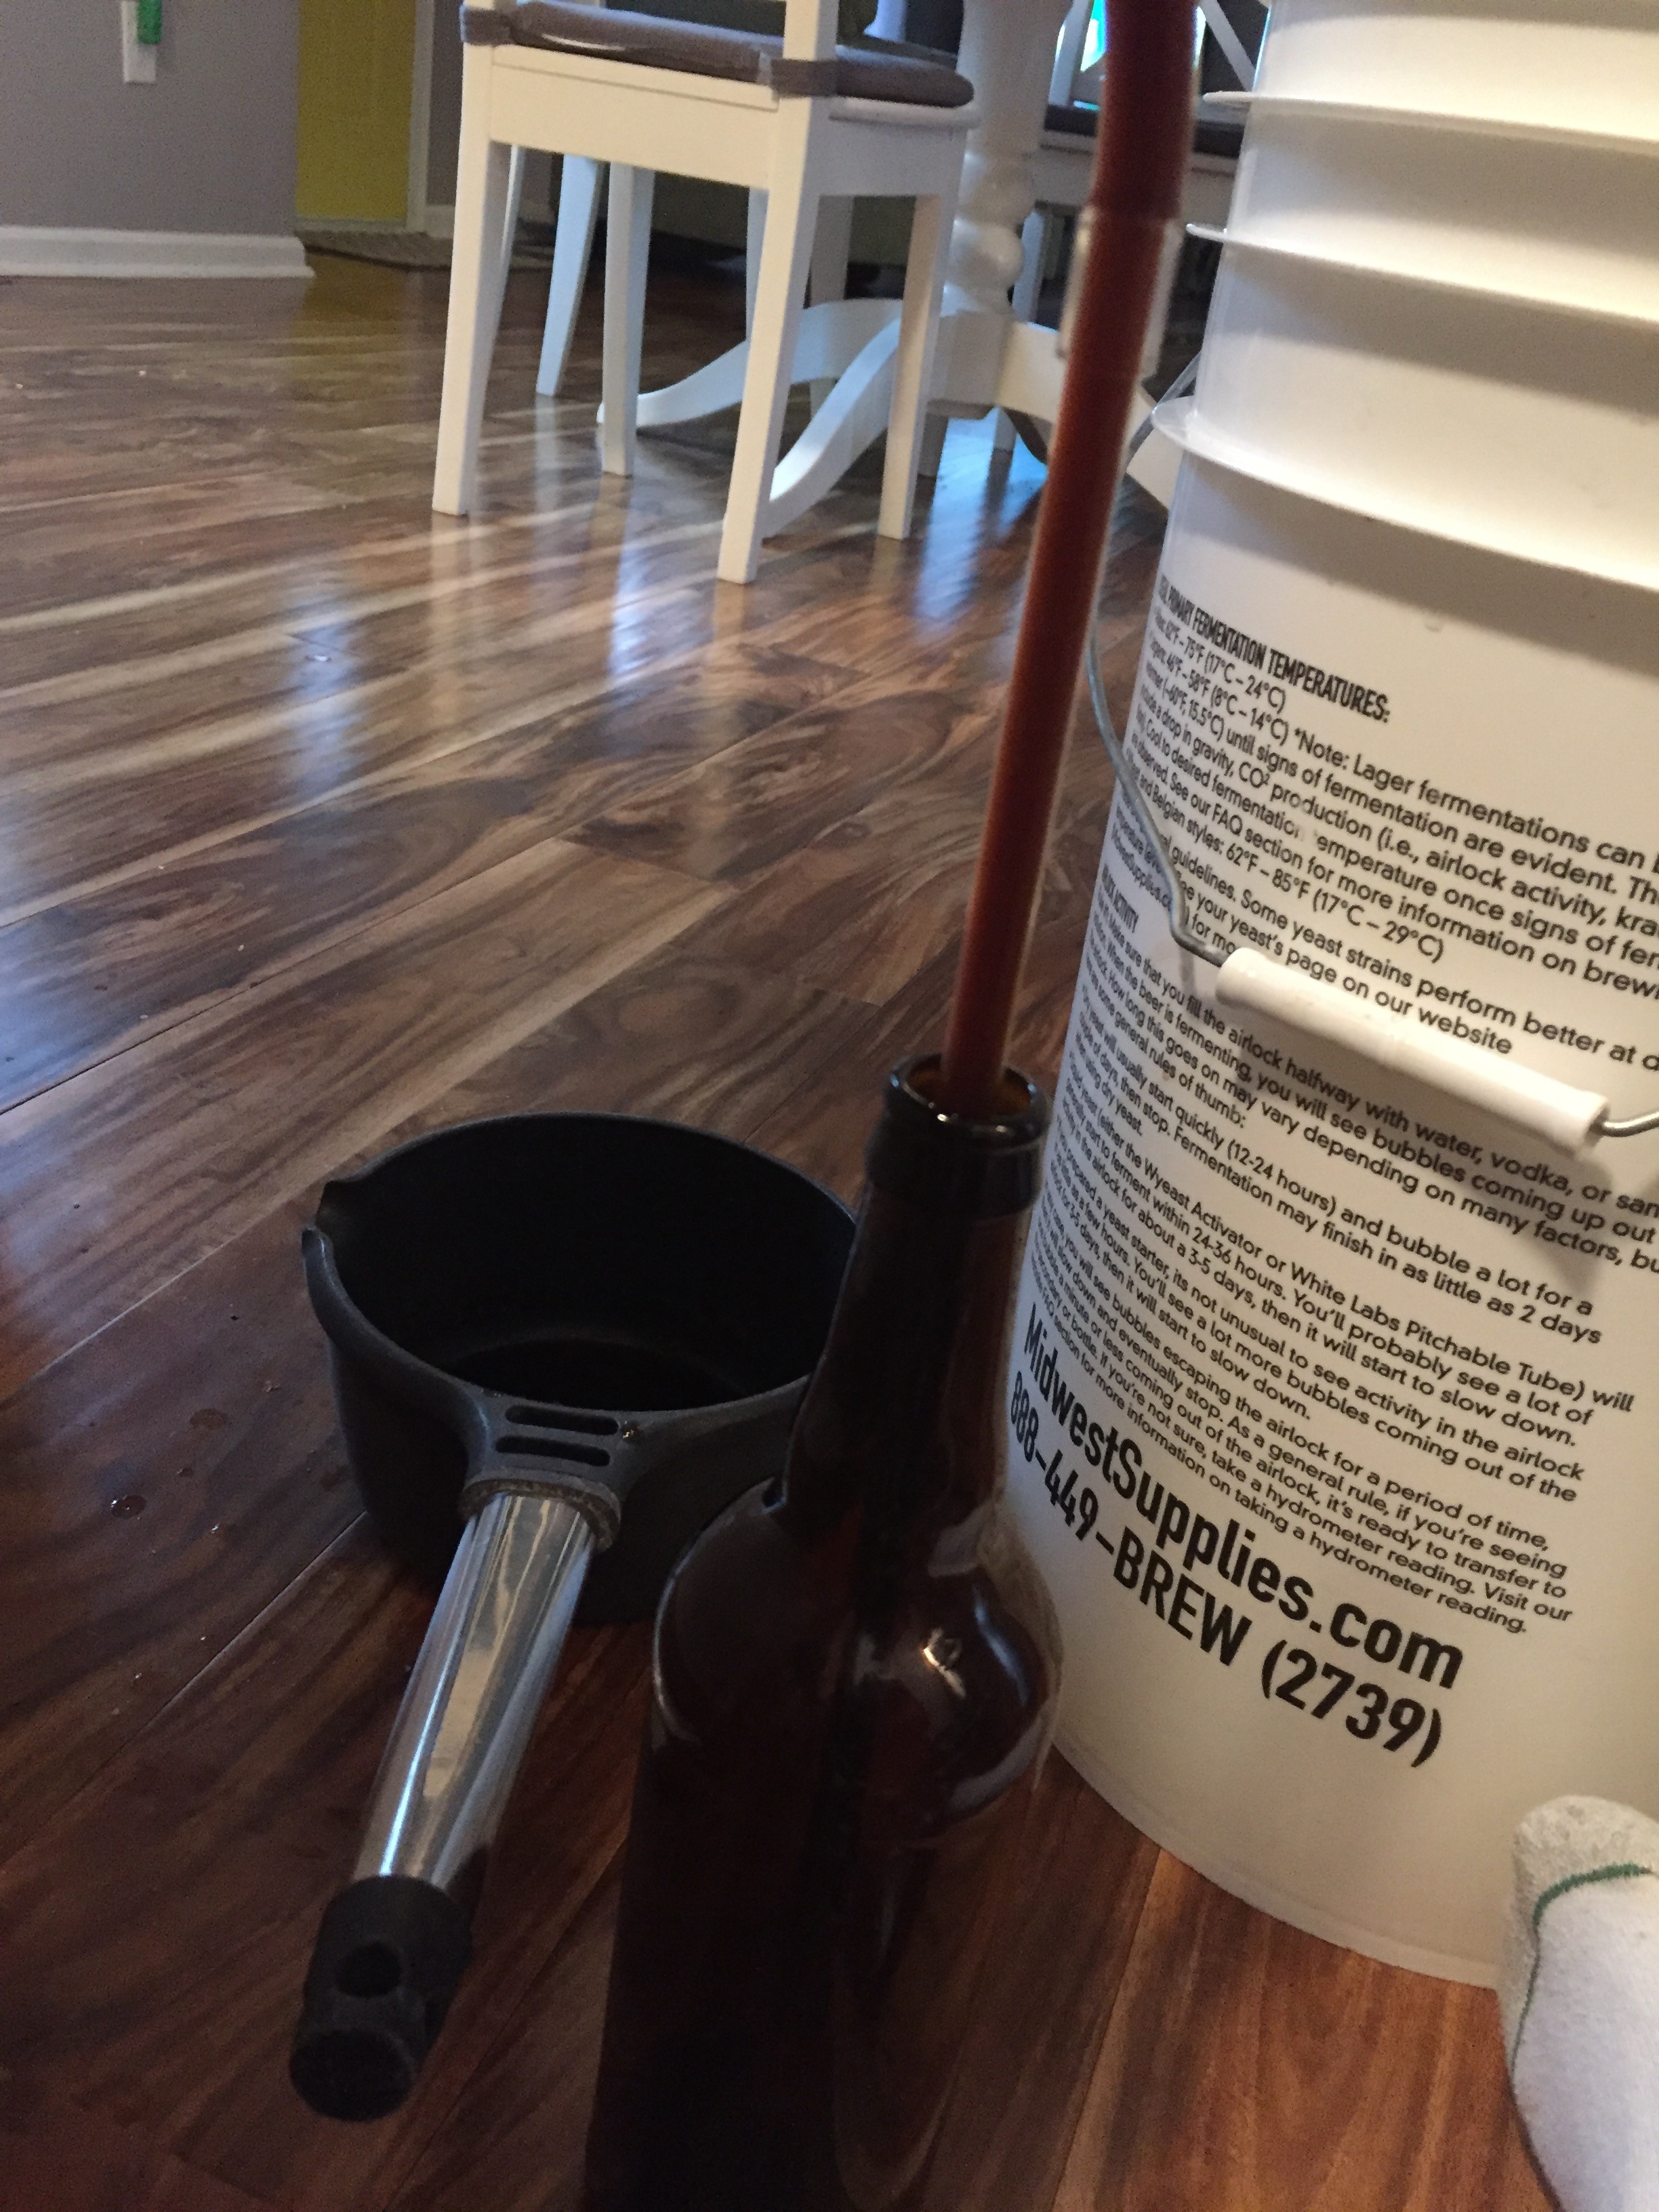
I ended up taking one of my fermenting buckets and filled it with very hot water and Star San. I was able to submerge all 12 22 oz bottles in there, making sure that each bottle was fully filled with the solution under water. I let them soak in there for about 30 minutes while I made my simple syrup for my priming sugar.
Remember, I made a small batch of this stuff because this country is drunk enough for having voted Trump in. This country does NOT need a full 5 gallons of my Russian Imperial Stout! My final yield was 2.3 gallons. Northernbrewer.com has a great calculator that told me I would need exactly 1.9 ounces of priming sugar.
After the bottles soaked, I read online about a cool way to dry them. I put a towel down at the bottom of the cardboard case that they came in. Then I just put the bottles back in upside down. The cardboard got just a little wet but nothing that wouldn’t dry on it’s own. Almost all the moisture just ended up on the towel at the bottom. I forgot to take a picture of this. Sorry.
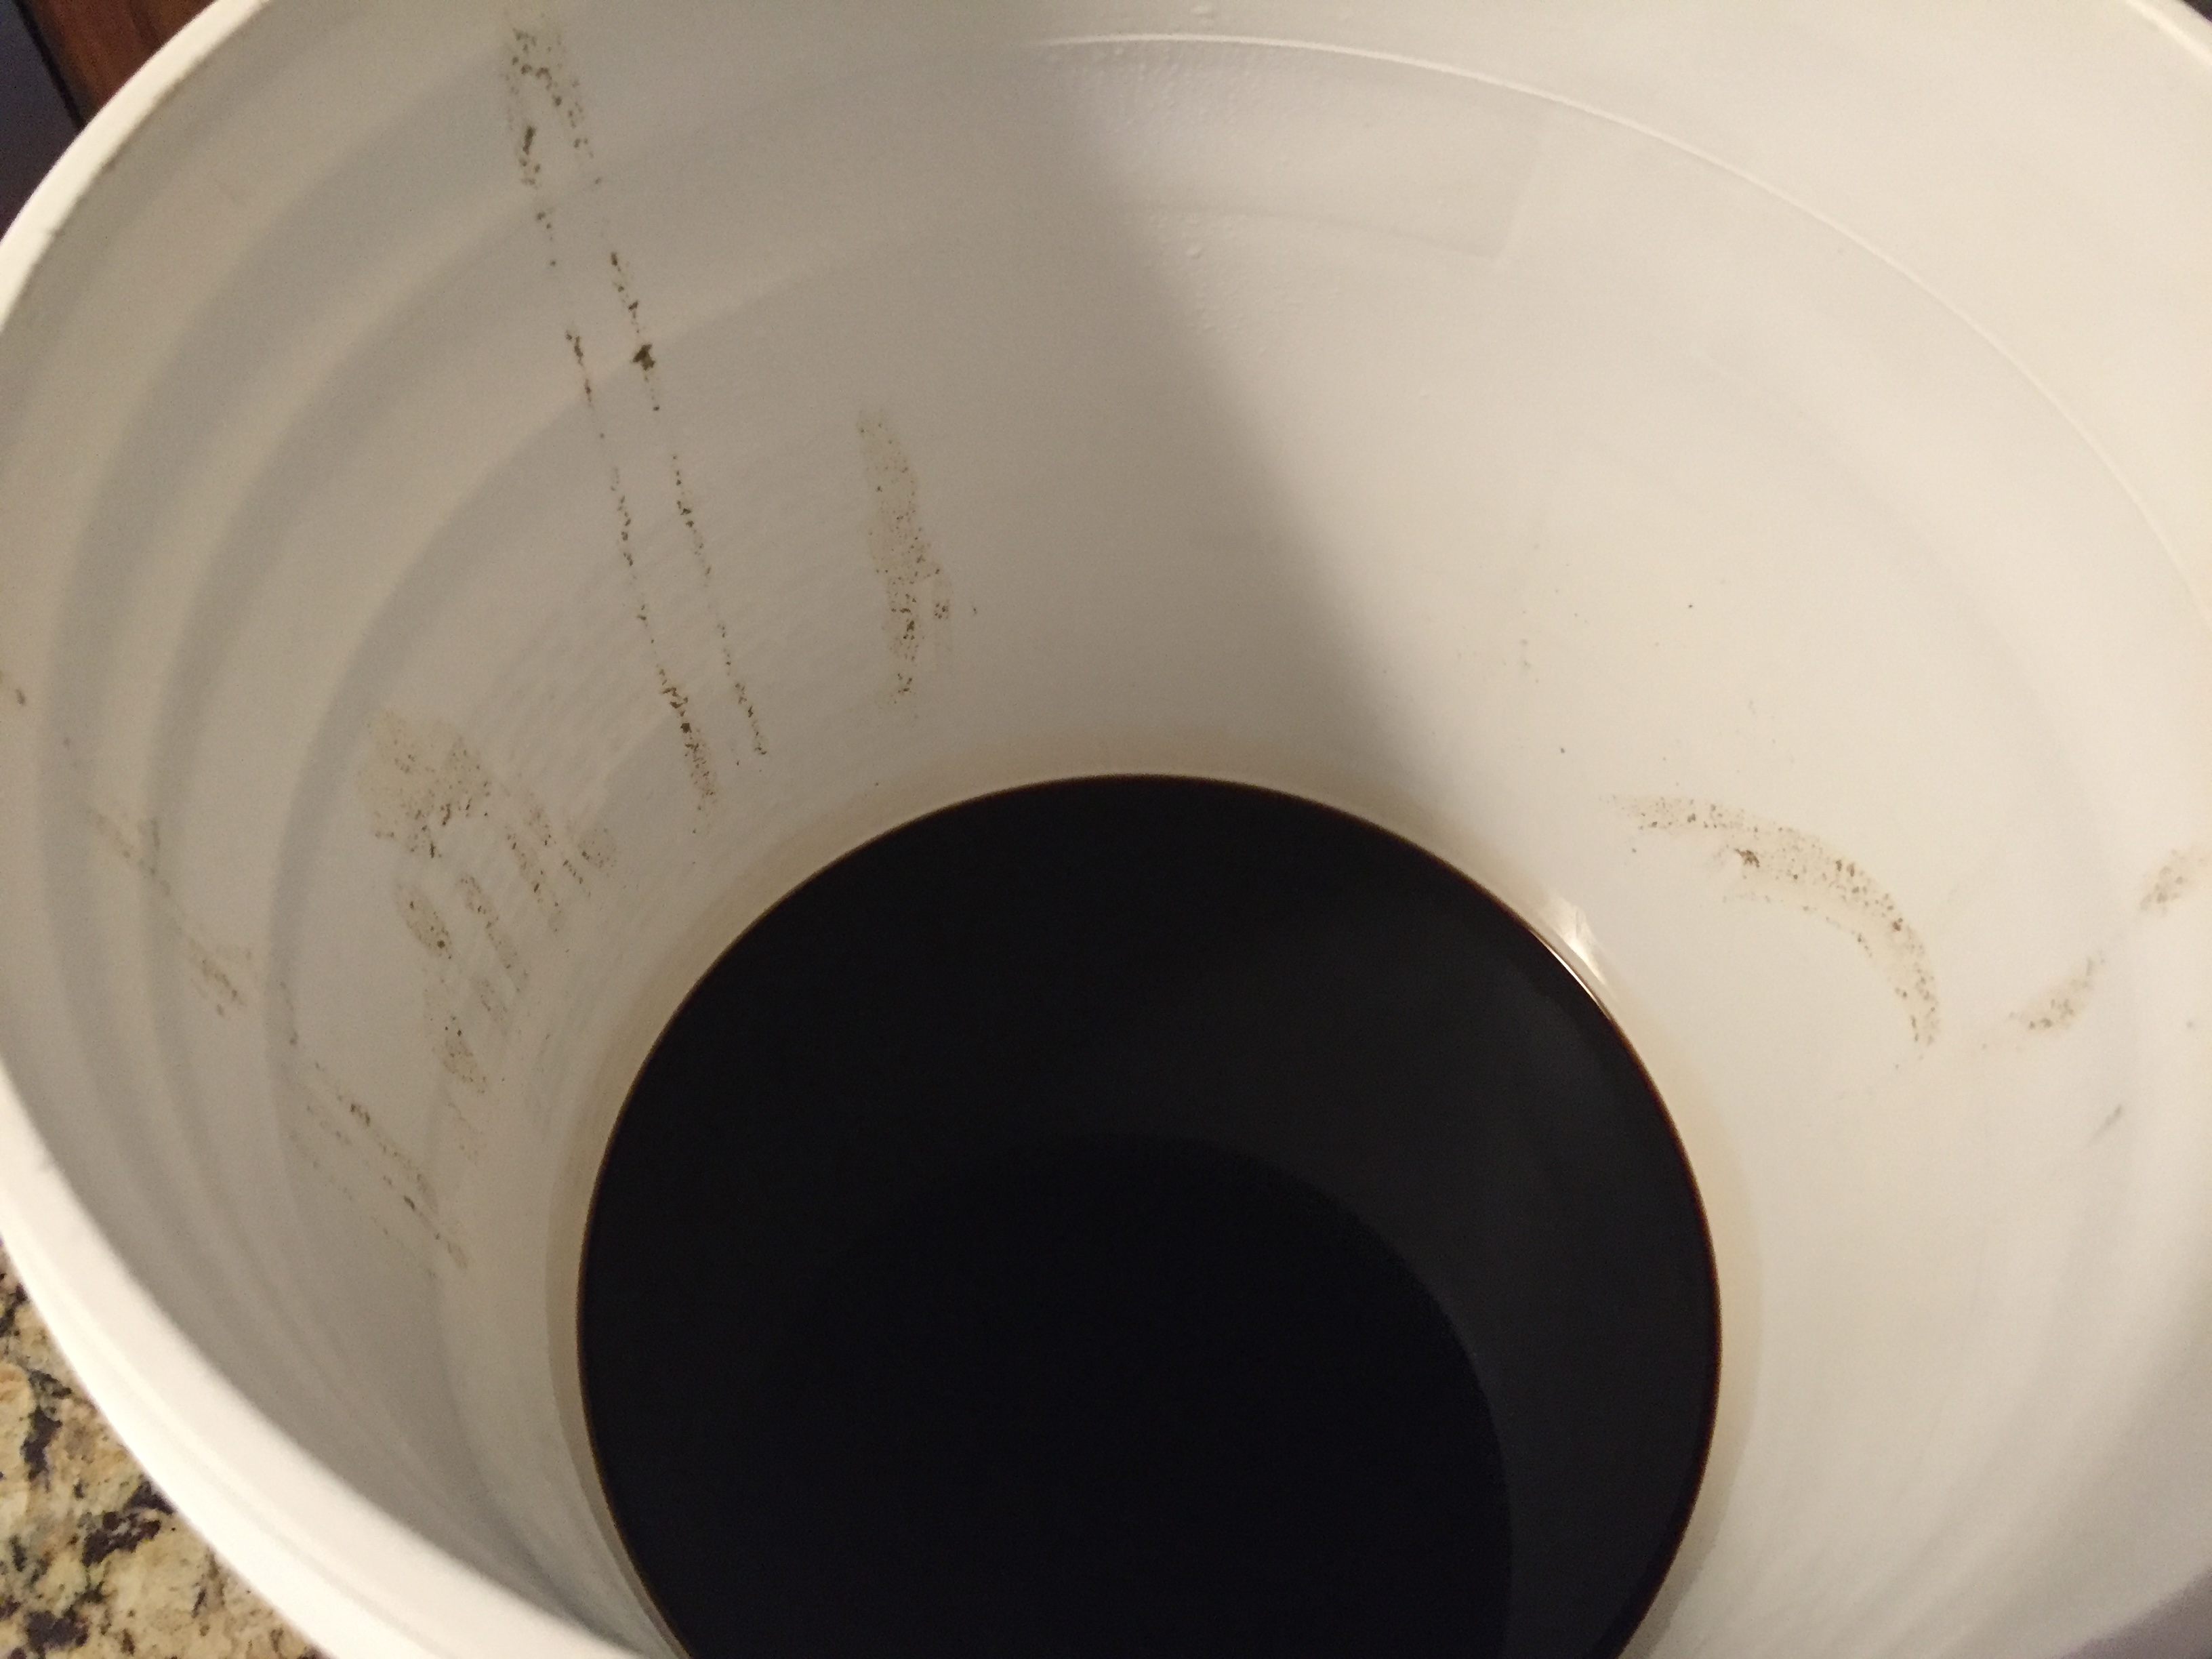
I mixed the sugar with about 1.25 cups of water and boiled it for about 5 minutes. I let it cool and opened up the lid of my bottling bucket to look into the abyss of my creation.
I sanitized a whisker and gently stirred in the sugar solution. With my bottles dry and my beer primed, it was time to do what we came here to do. Bottle!
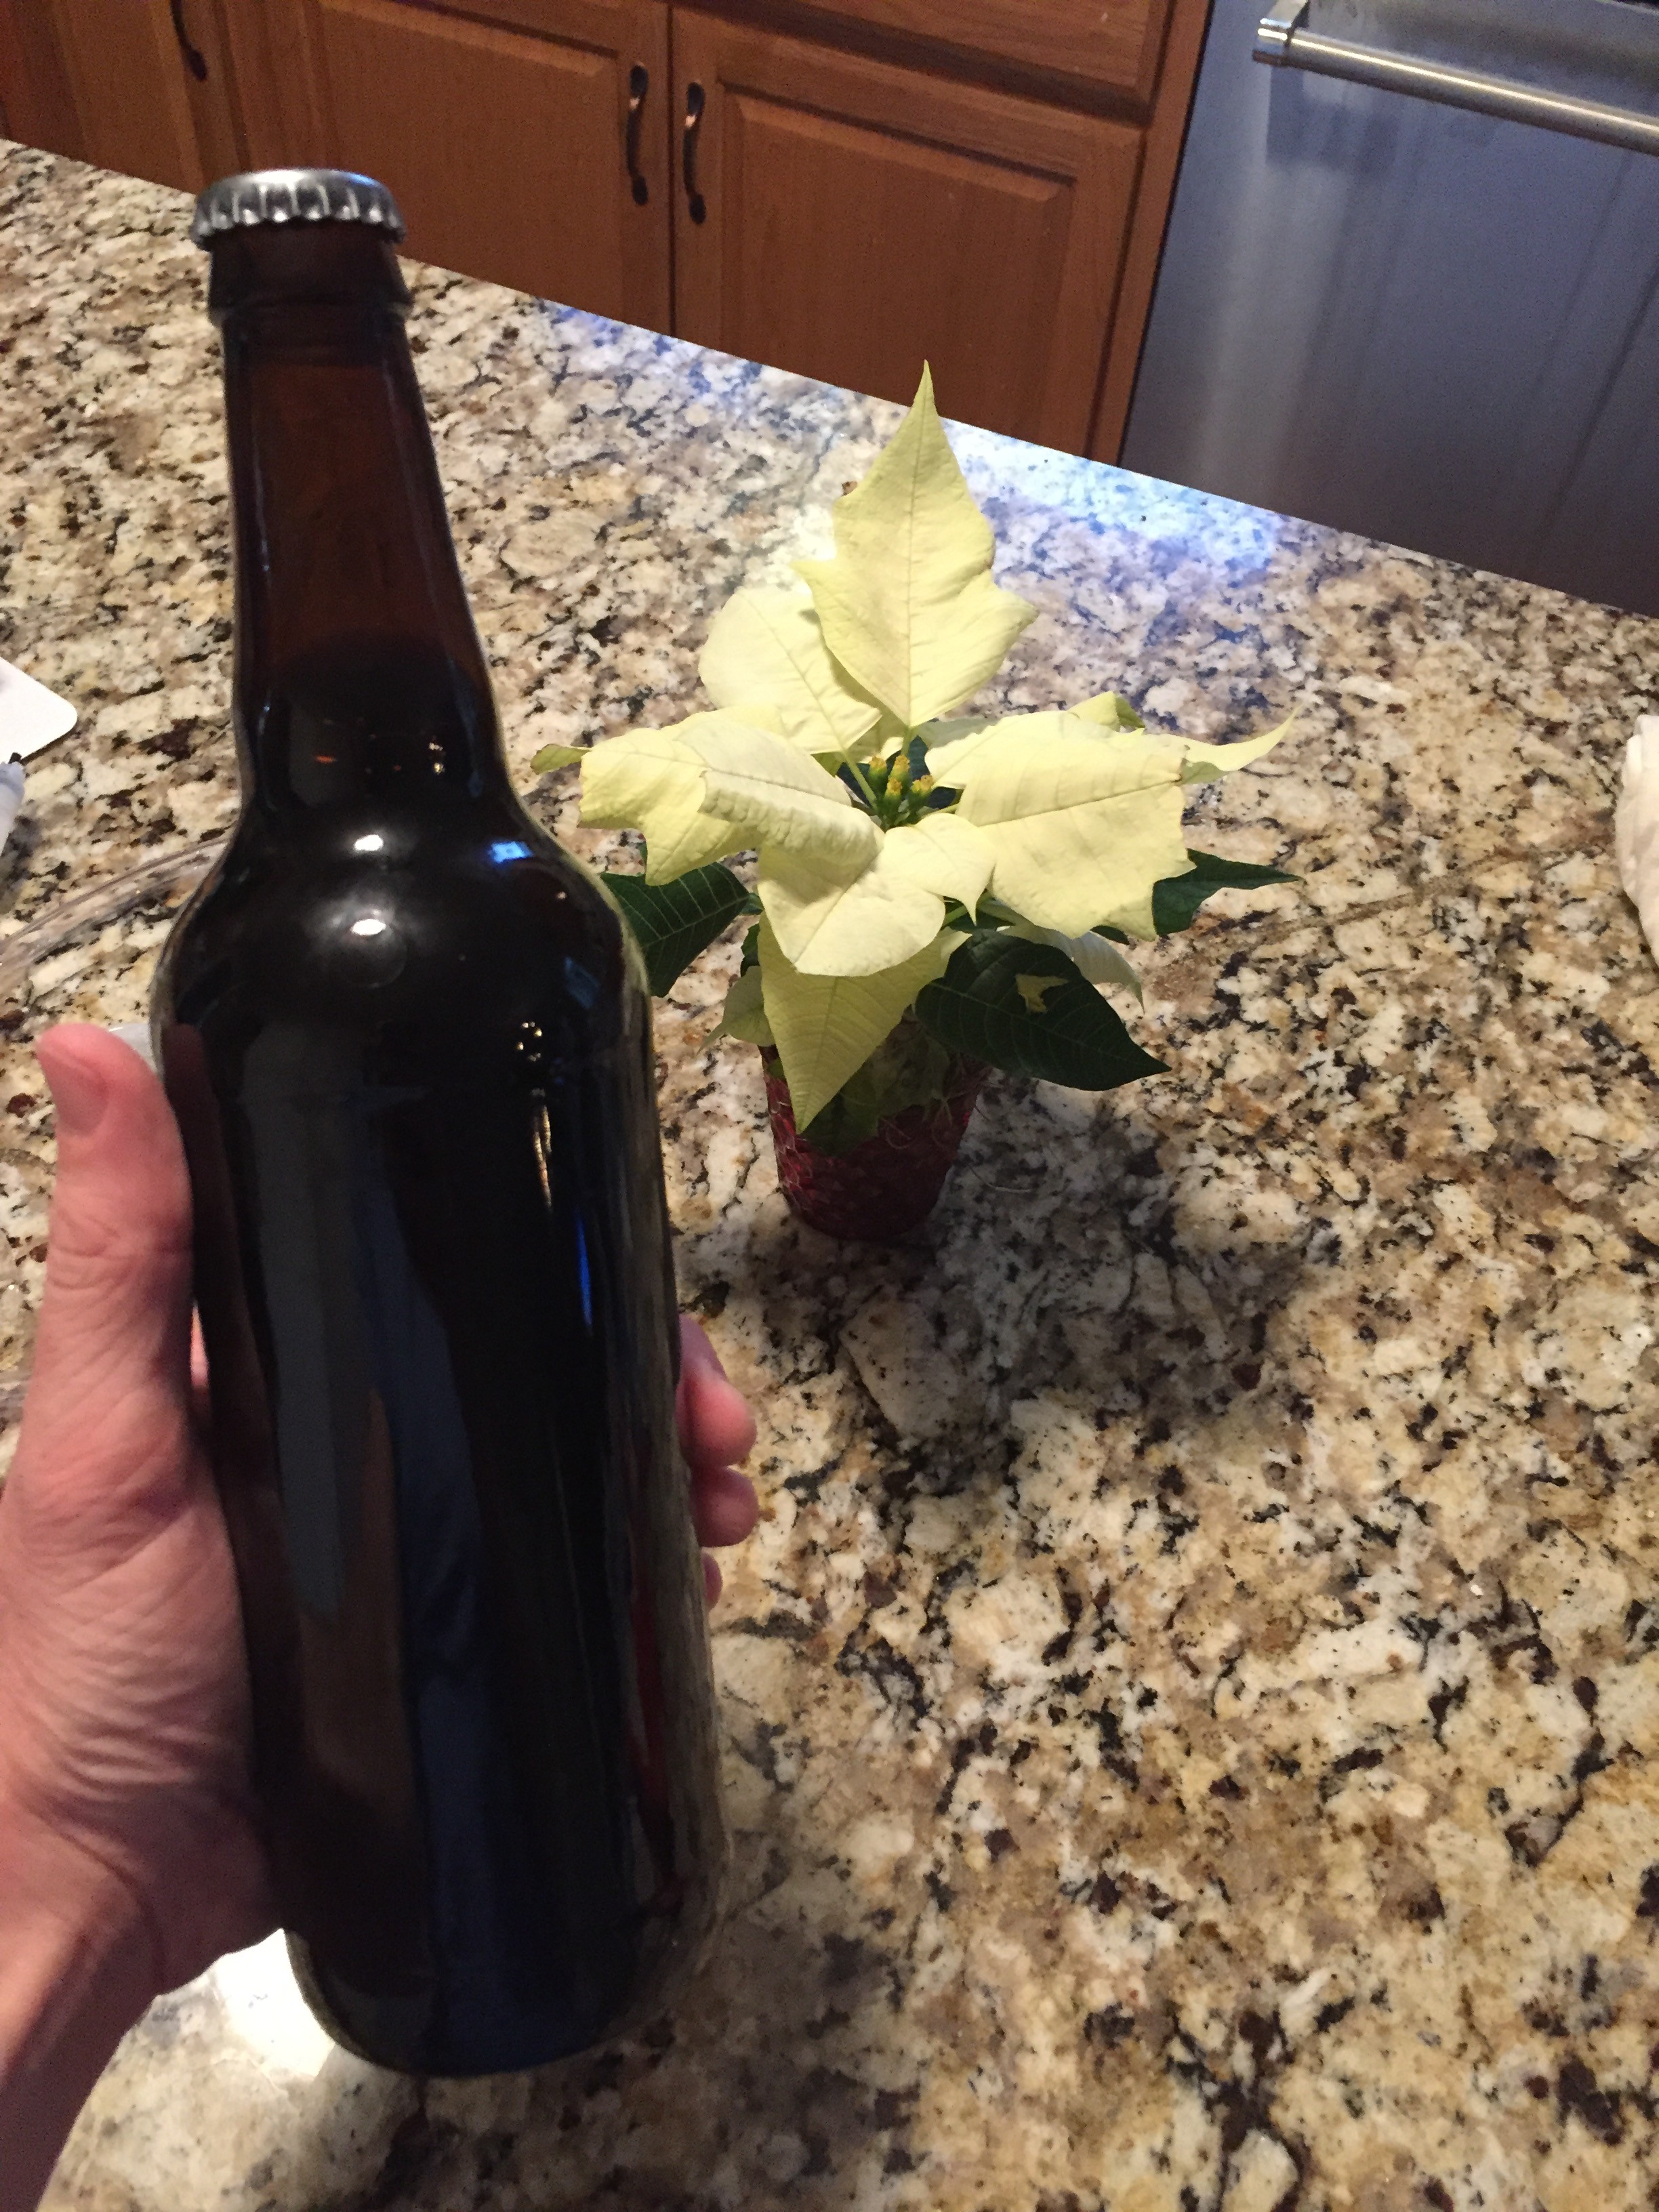
I bought a spring loaded bottle filler. It was about $3 and worth every penny. I just attached it to my tube, put the bucket on the island of my kitchen and sat down on the floor. From there, it was pretty easy. I had an old bottle capper that came with my “starter kit” when I began brewing. I had never put a bottle cap on anything before. I had some old beer bottles laying around so I did practice on those before doing it for real. Don’t forget to sanitize all this equipment by the way. The bottle filler, the caps, etc. I just threw them in with my bottles.
There was really no drama here. I filled the bottles and then capped them. Fill and repeat. I wasn’t too time consuming since I had a small batch and was filling large bottles. I could see how this would be tedious with 12 oz bottles and 5 gallons of beer. You may want to have a buddy help you. Other than that, all that was left was for me to create my beer label!
Let me know what you think of my process. What could I have done better? I’ll update again to let you know how the beer turned out. Thanks!
Leave a Reply